
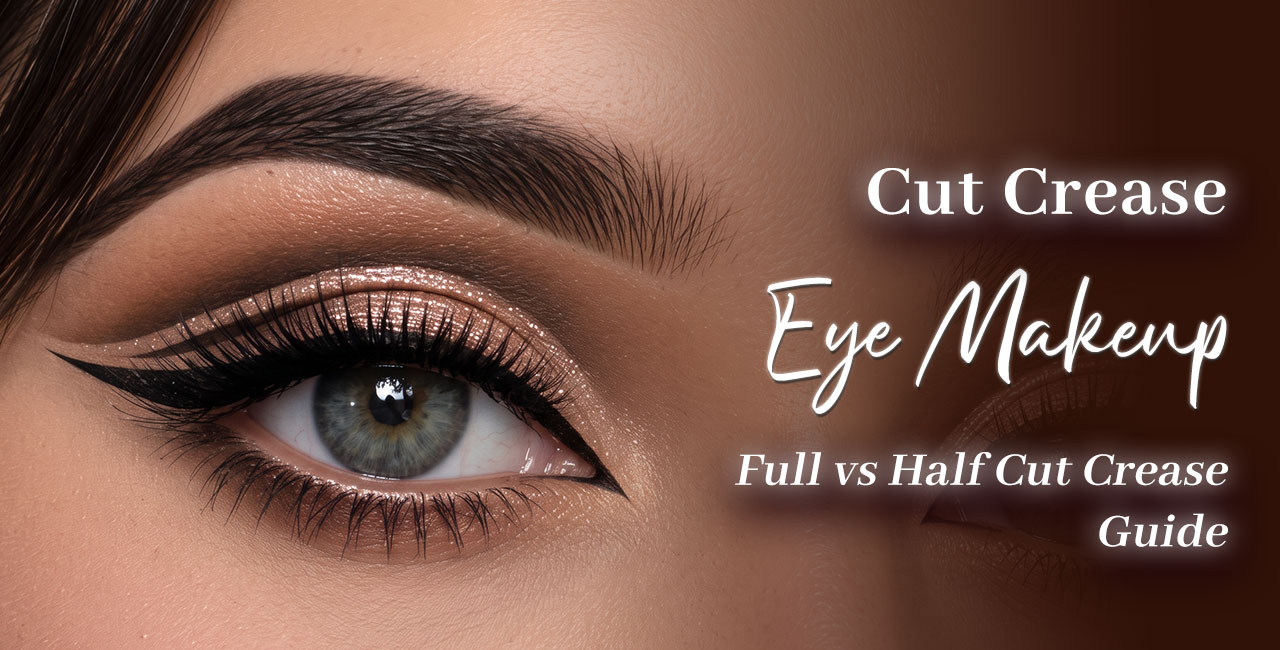
Cut Crease Eye Makeup: Full vs Half Cut Crease Guide
Cut crease eye makeup is created by applying a lighter shade on the lid and a darker shade along the crease. The two shades are blended while keeping a sharp, defined line between them instead of a soft fade.
This defined line adds depth to the eyes and makes the lid colour pop. Unlike a smokey eye, where the shades seamlessly blend into each other, a cut crease keeps the contrast crisp and defined.
We get asked about this technique a lot at MSTC, especially by students who’ve watched an online tutorial and found it a little intimidating. When done well, a cut crease can look very precise, almost surgical.
But once you understand what’s actually happening — a light shade on the lid, a dark shade defining the crease, and a sharp line in between — it starts to feel much simpler.
Let’s break it down properly, including the two versions people ask about most: full cut crease and half cut crease.
What Is Cut Crease Eye Makeup?
Think of it less as “eyeshadow” and more as sculpting with colour. In a regular eye look, the shades are blended so seamlessly that it’s hard to tell where one begins and the other ends. Cut crease eye makeup does the opposite intentionally. It uses the crease line as a sharp boundary, making the lid look like a separate canvas from the brow bone.
That’s exactly why the technique photographs so well and stands out on stage. It visually defines and sculpts the eye socket, which is why you’ll often see it in bridal and editorial makeup, where the look needs to stay defined under strong lighting and camera flash.
And a cut crease isn’t just one fixed look. There are two main versions — full cut crease and half cut crease — and each can suit different eye shapes, occasions, and comfort levels with the technique. We’ll break both down below.
What You’ll Need Before You Start?
Nothing too exotic is needed, but a few things matter more for a cut crease than for most other eye looks:
Eyeshadow Primer: This technique can highlight every bit of creasing, so don’t skip it.
Light Lid Shade: Usually a pale or shimmery shade to make the lid look brighter and more defined.
Matte Transition Shade: Helps create a smooth transition between the shades.
Deep Matte Crease Shade: This is what actually “cuts” the crease and creates definition.
Small, Dense, Flat Brush: Essential for precision and creating that sharp crease line.
Concealer + Thin Brush: Helps clean up and sharpen the crease line afterward.
Setting Spray or Powder: Helps set the look and keep it in place for longer.
Full Cut Crease Eye Makeup: Step by Step
A full cut crease covers the entire lid and takes the sharp line from the inner corner all the way to the outer corner. It’s the more dramatic, more graphic version, and it’s the one most people mean when they say “cut crease”.
Prime the lid. Apply a thin, even layer so the shadow doesn’t shift or crease while you work.
Apply the lid shade first. Take your light or shimmery shade and apply it across the entire lid, right up to the crease. This creates your base canvas.
Map the crease. Before applying shadow, some artists use a white pencil or concealer to sketch a rough line along the socket. It’s optional, but helpful for beginners to see where the “cut” will sit.
Pack in the crease shade. Using a small, flat brush, press your darkest matte shade along the crease, following the natural socket line from the inner to outer corner.
Blend upward, never downward. This is what determines whether you get a clean cut crease or a muddy eye look. Gently blend the crease shade towards the brow bone, while keeping the line against the lid crisp and untouched.
Clean the line with concealer. Take a thin, flat brush with a little concealer and trace along the crease line to sharpen it. This is what gives cut crease looks that precise, polished finish.
Reapply the lid shade. Once the line is sharp, go over the lid shade again to freshen it up, as some of it may have been disturbed during blending.
Line and finish. Apply your eyeliner along the lash line, add mascara or lashes, and you’re done.
Half Cut Crease Eye Makeup: Step by Step
A half cut crease only defines the outer half to two-thirds of the eye, letting the inner corner blend more softly. It’s the more wearable, everyday-friendly version, and it’s usually where we tell beginners to start.
- Prime and apply your lid shade just like before, across the entire lid.
- Focus the crease shade on the outer half. Instead of taking the darker shade to the inner corner, apply it from the centre of the eye toward the outer corner.
- Create a sharp line only on the outer corner. Use a flat brush to press and define the colour along the outer crease. This gives you the “half” cut crease effect.
- Blend softly toward the inner corner. Let the crease shade fade naturally as you move inward instead of keeping a sharp edge throughout.
- Sharpen the outer line with concealer, just like a full cut crease, but only along the outer section.
- Add a touch of shimmer to the inner corner for extra brightness. It pairs beautifully with a half cut crease and makes the eyes look more awake.
- Line, curl your lashes, and finish as usual.
Full Cut Crease vs Half Cut Crease Eye Makeup: Which One Should You Pick?
This is probably the most common question we get once someone understands the basic technique, so here’s how we will break it down:
- Go full cut crease if you want maximum drama, you’re doing bridal or stage makeup, or you have hooded eyes and need the extra lid space that this technique visually creates.
- Go half cut crease if you’re newer to the technique, want something wearable for daytime or office events, or have smaller or almond eyes where a full cut crease can sometimes feel like too much.
- Full cut crease eye makeup photographs beautifully but takes more time and a steadier hand.
- Half cut crease eye makeup is quicker, more forgiving of small mistakes, and still gives you that lifted, defined look without going all the way.
Neither version is “better” — it really comes down to the occasion and how comfortable you are with precision work.
Cut Crease for Different Eye Shapes
- Hooded Eyes: A full cut crease works beautifully here, creating the illusion of more visible lid space even when your natural crease is hidden.
- Monolids: Start with a half cut crease placed slightly above your natural crease to create definition without working against your eye shape.
- Round Eyes: Extend a half cut crease slightly outward and upward to create a more elongated, lifted appearance.
- Almond Eyes: Both full and half cut creases work well. Almond eyes are naturally versatile and suit most eye makeup techniques. Similar to what we mentioned in our guide on monochromatic eye makeup looks.
Cut Crease Eye Makeup for Bridal Looks
Cut crease has become a genuinely popular request for both Indian and Western bridal makeup, mainly because it holds up so well under wedding lighting and camera flash. For brides, we usually recommend testing a half cut crease at the trial first — it’s easier to adjust on the day and still gives that lifted, camera-ready finish without overwhelming the rest of the bridal look. If the bride wants something bolder for the reception or sangeet, a full cut crease with a metallic lid shade tends to work beautifully.
This is exactly the kind of colour placement and precision work we go deeper into in our bridal makeup course, for anyone learning to do this professionally rather than just for personal use.
Common Mistakes to Avoid
Skipping the lid shade before cutting the crease: If you cut the crease first, the edges can get muddy when you go back in with a lighter shade.
Blending the line downward: This softens the sharp edge you’re trying to create and takes away from the defined look.
Using a fluffy brush for the crease line: Use a small, dense, flat brush for a precise cut crease. A fluffy blending brush will blur the line instead of defining it.
Skipping the concealer clean-up: This step makes a big difference in taking your cut crease from amateur to professionally defined.
Starting with a full cut crease: If you’re a beginner, start with a half cut crease. It’s easier to master before moving on to the full version.
Final Thought
Cut crease eye makeup rewards patience more than talent. The steps aren’t complicated: a light shade on the lid, a darker shade along the crease, and a sharp line in between. But achieving a clean, precise finish takes practice and the right small, detailed brush.
If you’re trying it for the first time, start with a half cut crease. Once you’re comfortable placing the line exactly where you want it, you can move on to a full cut crease.
If you’re interested in mastering eye makeup techniques beyond the occasional party or wedding look, Makeup Studio Training Centre offers hands-on training in precision techniques, bridal makeup, hairstyling, and complete professional artistry.
You can also explore other eye makeup techniques like doe eye makeup and smokey eye makeup to build a more versatile skill set.
Frequently Asked Questions
1. What is cut crease eye makeup?
Cut crease eye makeup is a technique where a lighter shade is applied to the lid and a darker shade is placed along the crease, creating a sharp, defined line between the two instead of a soft blend. It’s designed to make the eyes look more sculpted and awake.
2. What is the difference between full cut crease and half cut crease eye makeup?
A full cut crease carries the sharp line from the inner corner to the outer corner of the eye, giving a bold, dramatic finish. A half cut crease only defines the outer half or two-thirds of the eye, keeping the inner corner softer, which makes it more wearable for everyday wear.
3. Is cut crease eye makeup good for hooded eyes?
Yes, it’s actually one of the best techniques for hooded eyes, since the defined crease line creates the illusion of visible lid space that hooded eyes often lack when the eye is open.
4. Which is easier for beginners, full or half cut crease?
Half cut crease is easier for beginners. It only requires precision on the outer portion of the eye, and small mistakes are far less noticeable than they would be on a full cut crease.
5. Can cut crease eye makeup be done for a wedding?
Yes, it’s a popular choice for bridal makeup because it photographs sharply under flash and stage lighting. Most brides trial a half cut crease first and save a bolder full cut crease for events like the reception or sangeet.
6. What brush is best for cut crease eye makeup?
A small, dense, flat brush is essential for packing colour into the crease and keeping the line sharp. A fluffy blending brush will soften the line instead of defining it, which works against the technique.

Sorry, the comment form is closed at this time.